Config Eclipse IDE
Content
Access to EC2
- Access AWS EC2, and open EC2 instance DevAxWindowsHost.
- Click Connect.
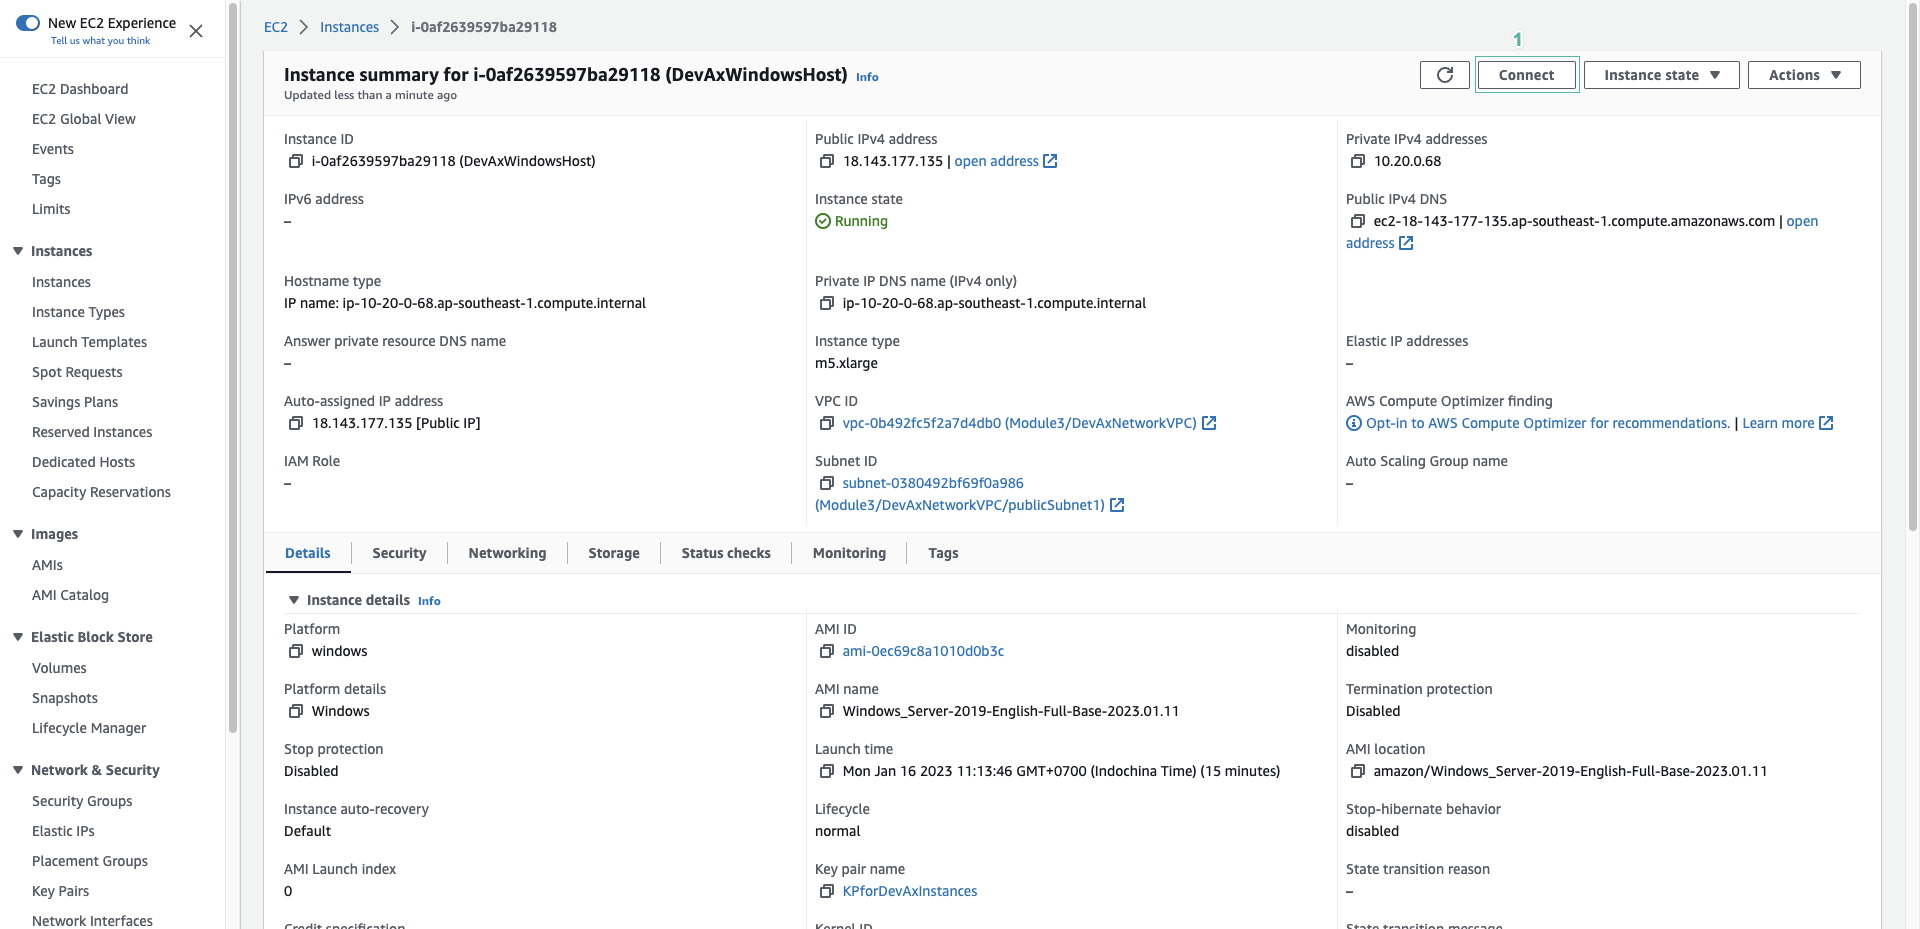
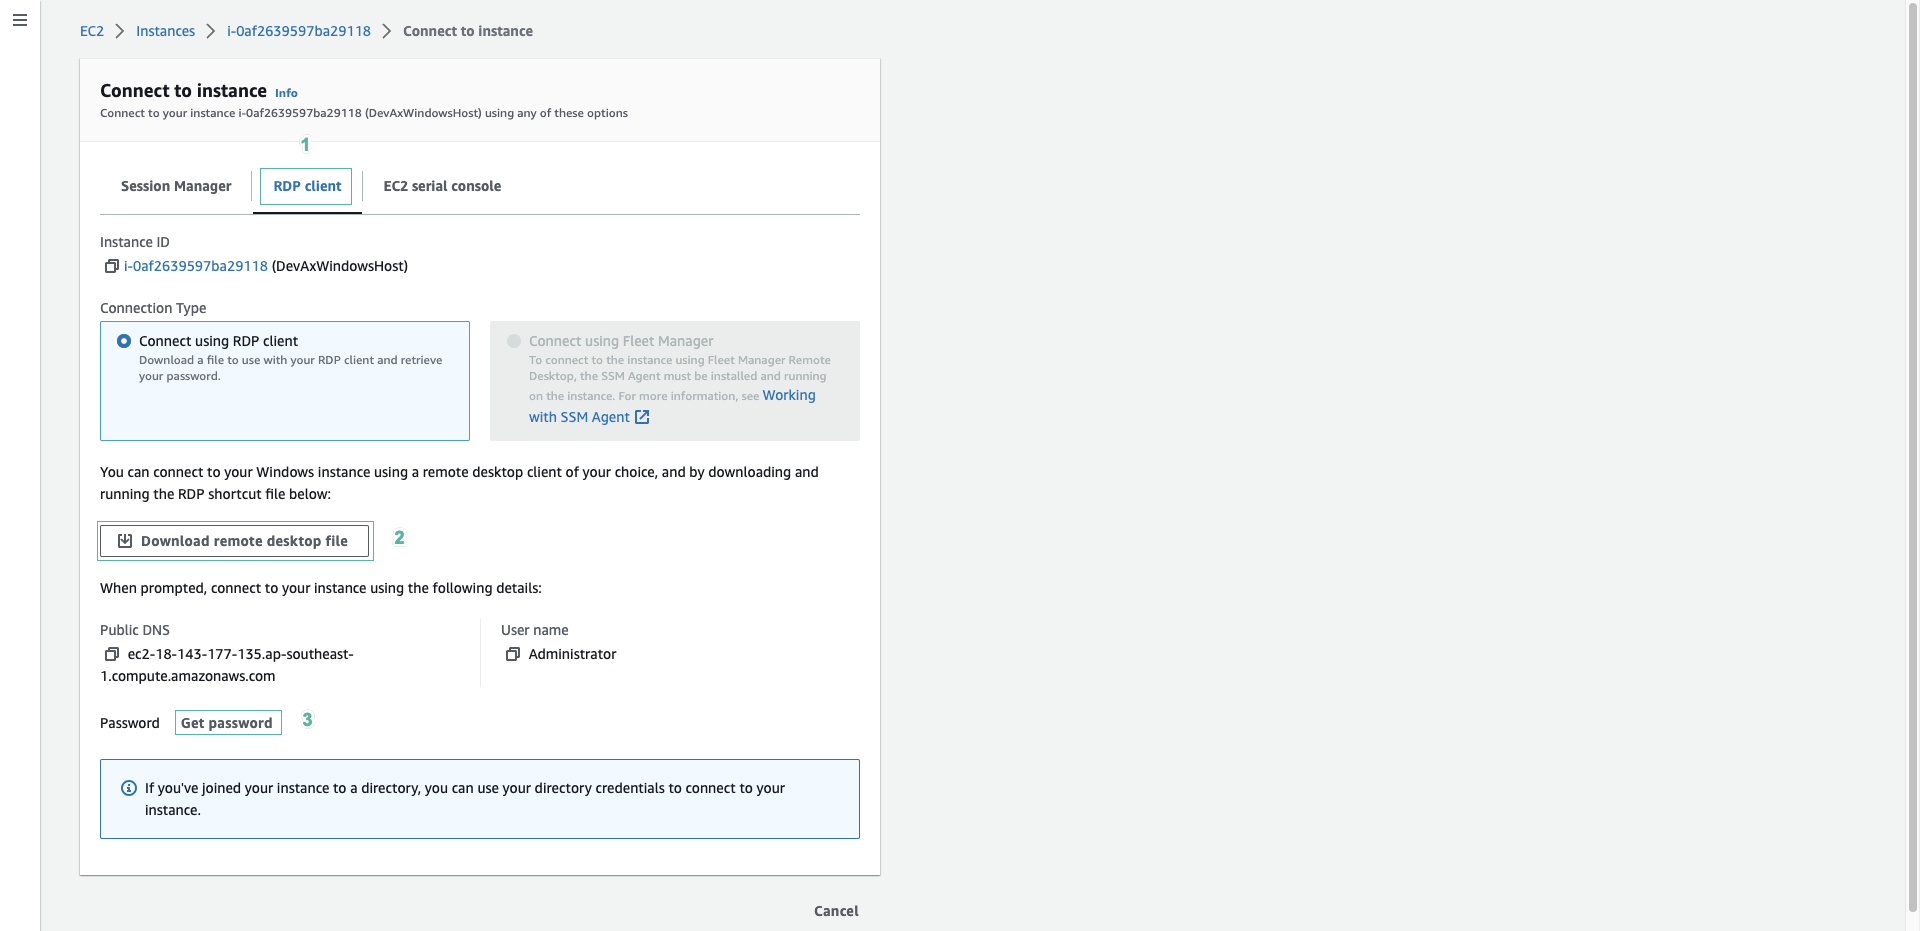
- Select RDP tab, then click Download remote desktop file to download RDP file to remote access.
- Click Get password.
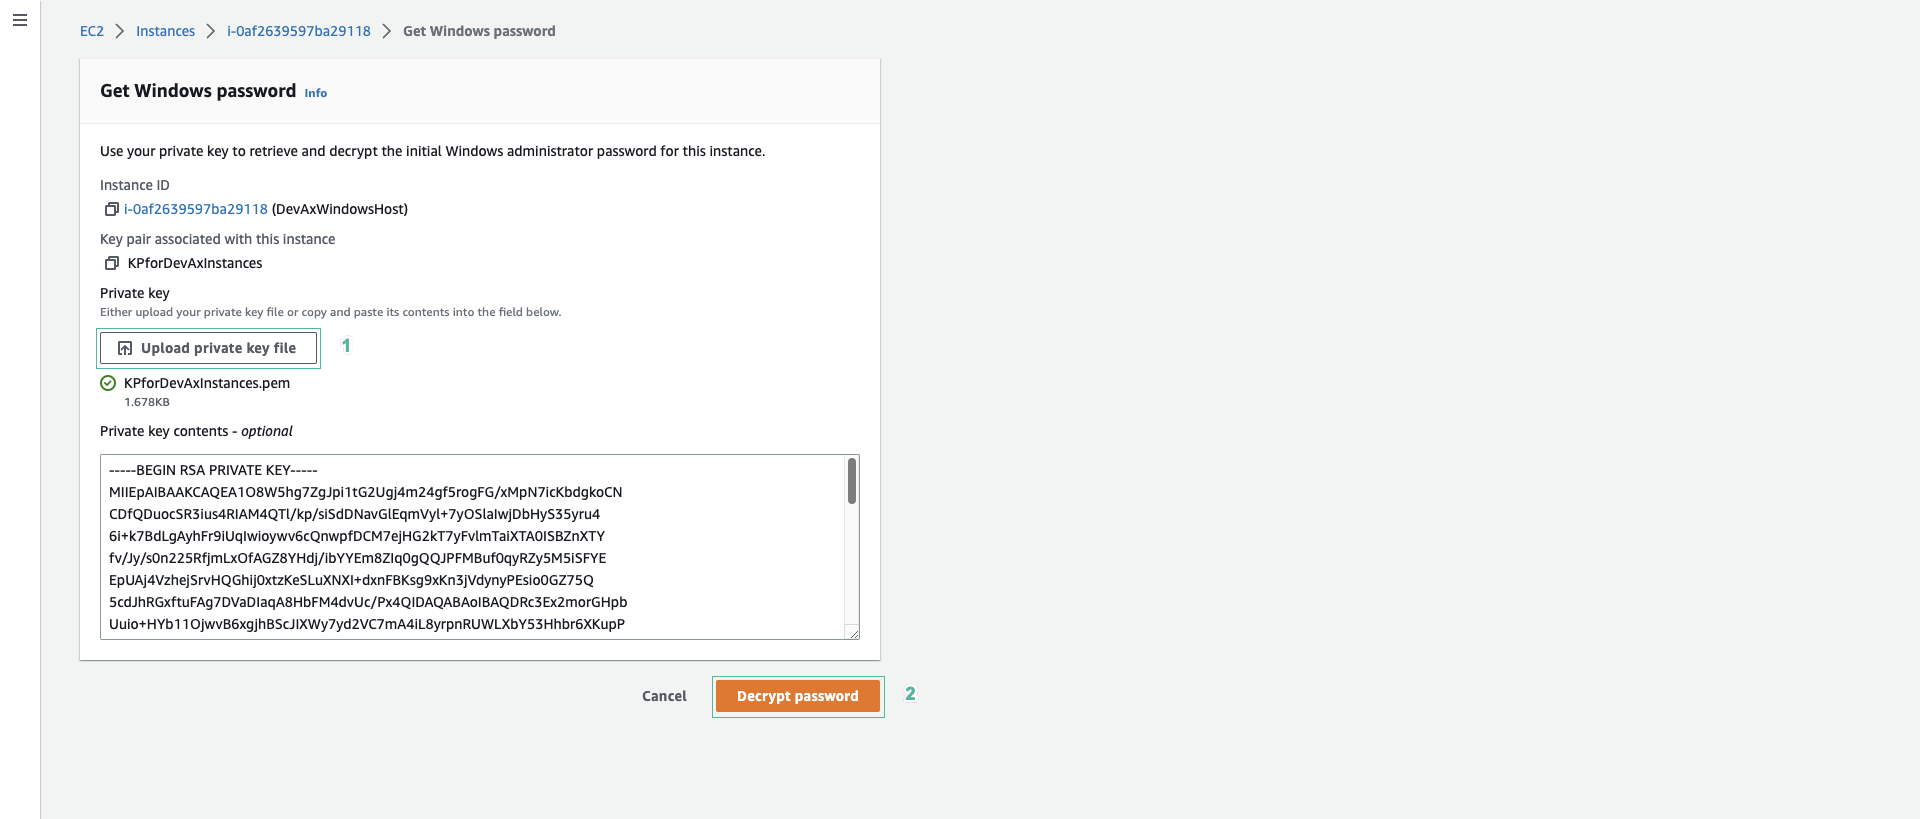
- Click Upload private key file and select KPforDevAxInstances keypair to decrypt password for windows virtual.
- Click Decrypt password.
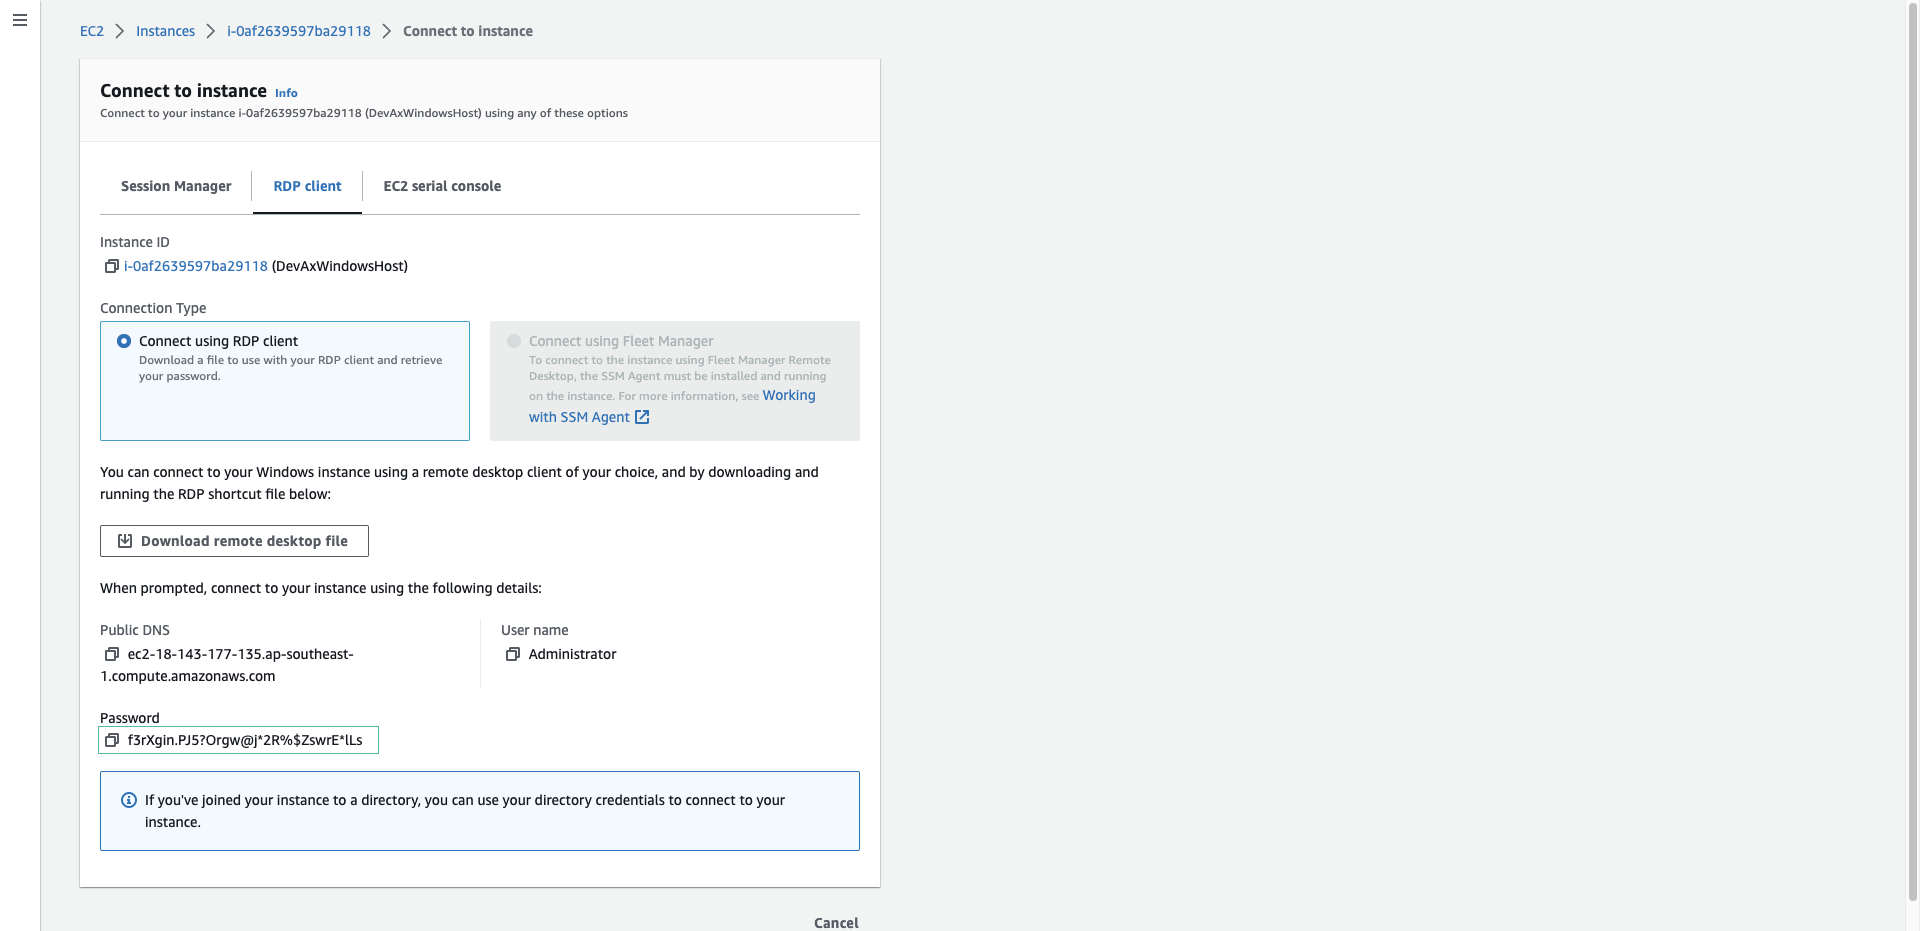
- Copy passowrd and used to log into the Windows virtual machine.
Config Eclipse IDE
- Open the command line and configure the profile for the workshop.
Please create access key and secret access key for awsstudent user generated by Cloud Formation Template in preparation section and use it to config awscli. Also, go to the IAM console, select IAM User awsstudent, then select Permissions, Add permissions|Attach existing policy directly and select AdministratorAccess.
aws configure set profile.aws-lab-env.region <your-region>
aws configure set profile.aws-lab-env.aws_access_key_id <your_access_key_id>
aws configure set profile.aws-lab-env.aws_secret_access_key <your_secret_access_key>

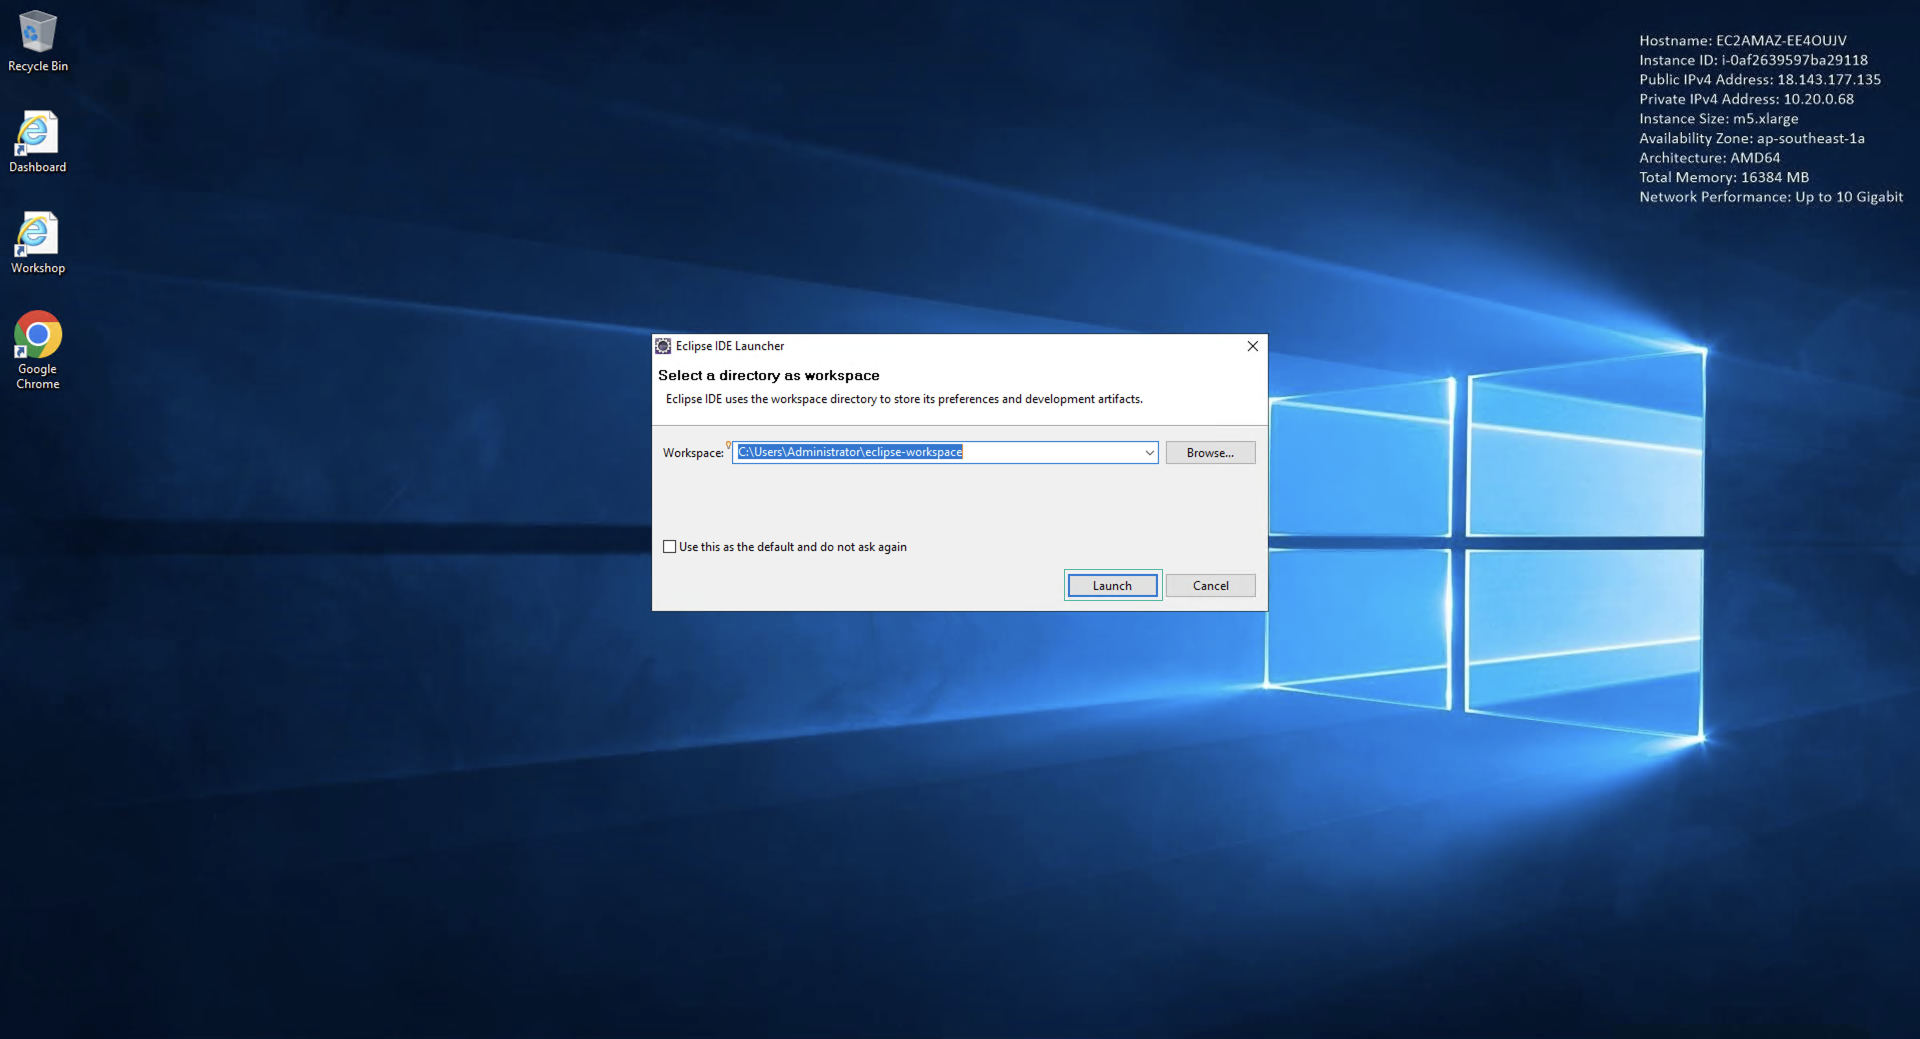
- Open Eclipse IDE, in Eclipse IDE Launcher window, leave the default option and click Launch. Click Finish for the AWS Toolkit crawl window.
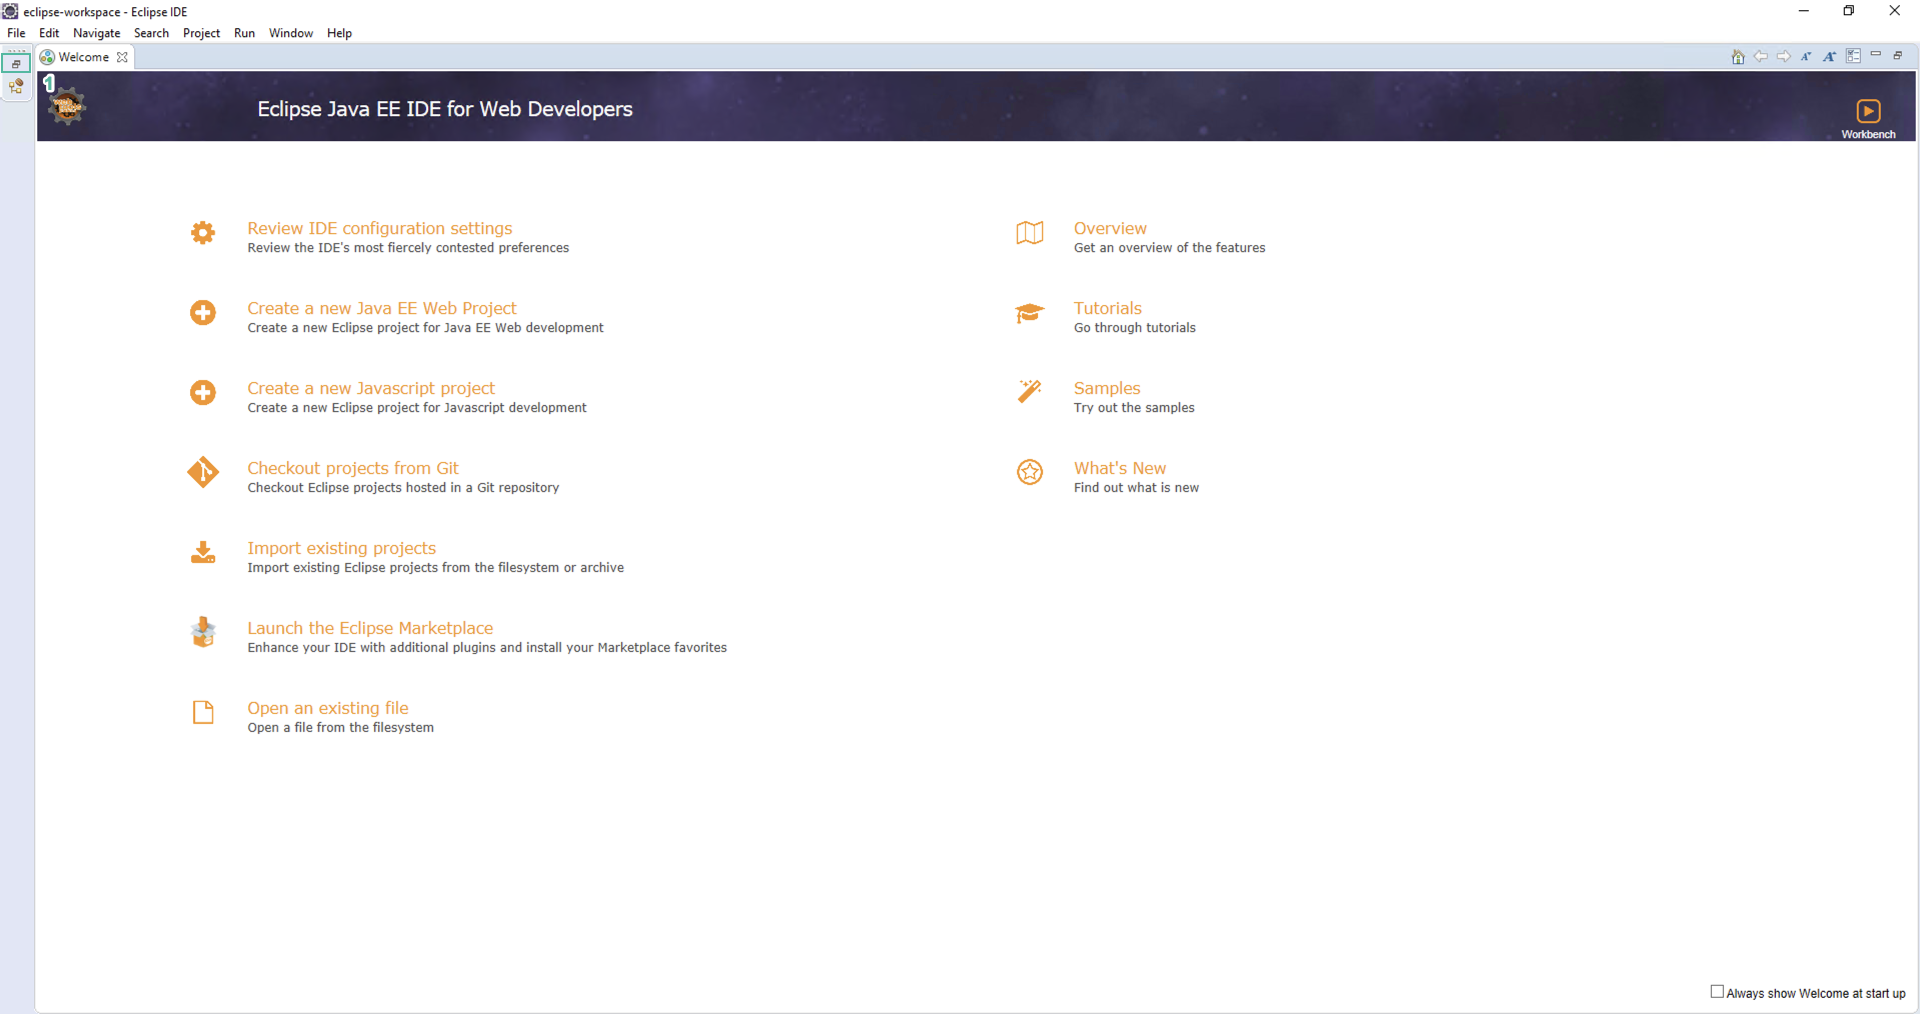
- Click Restore.
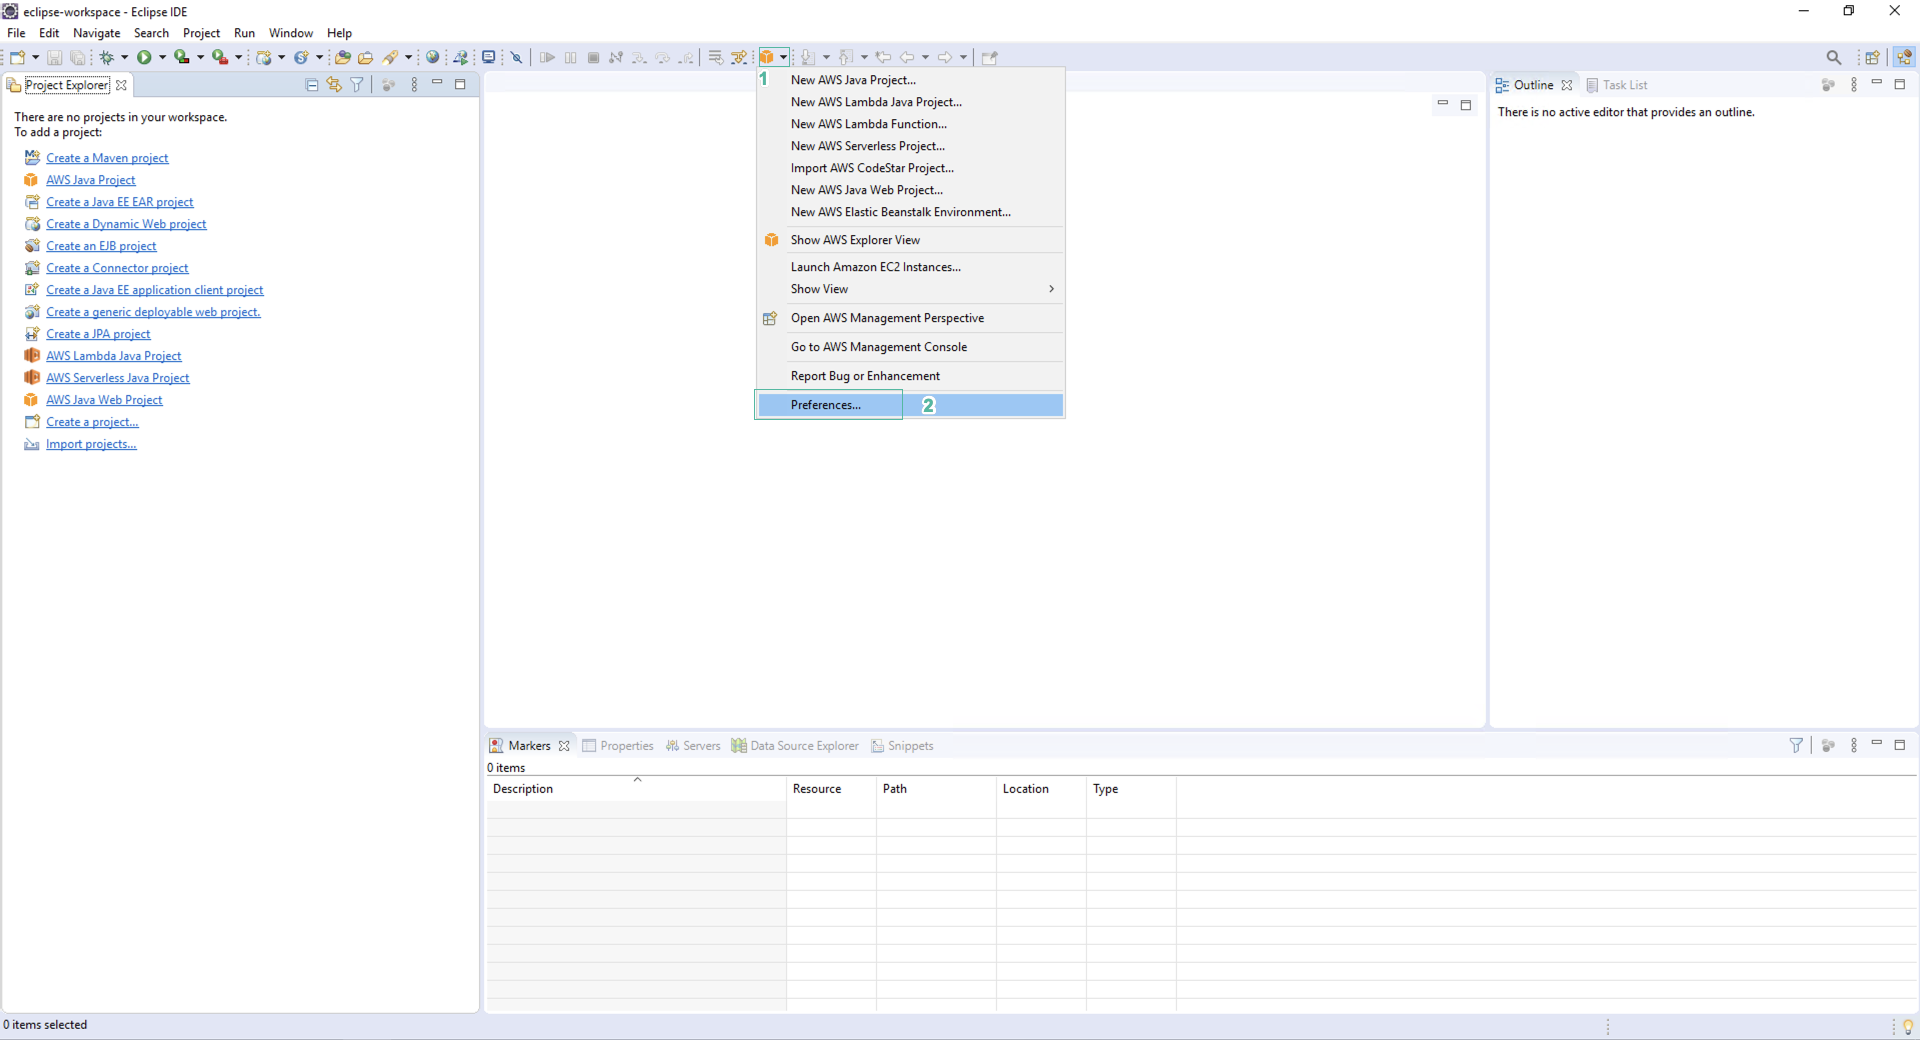
- Click AWS symbol and select Click vào biểu tượng AWS and select the arrow, then select Preferences.
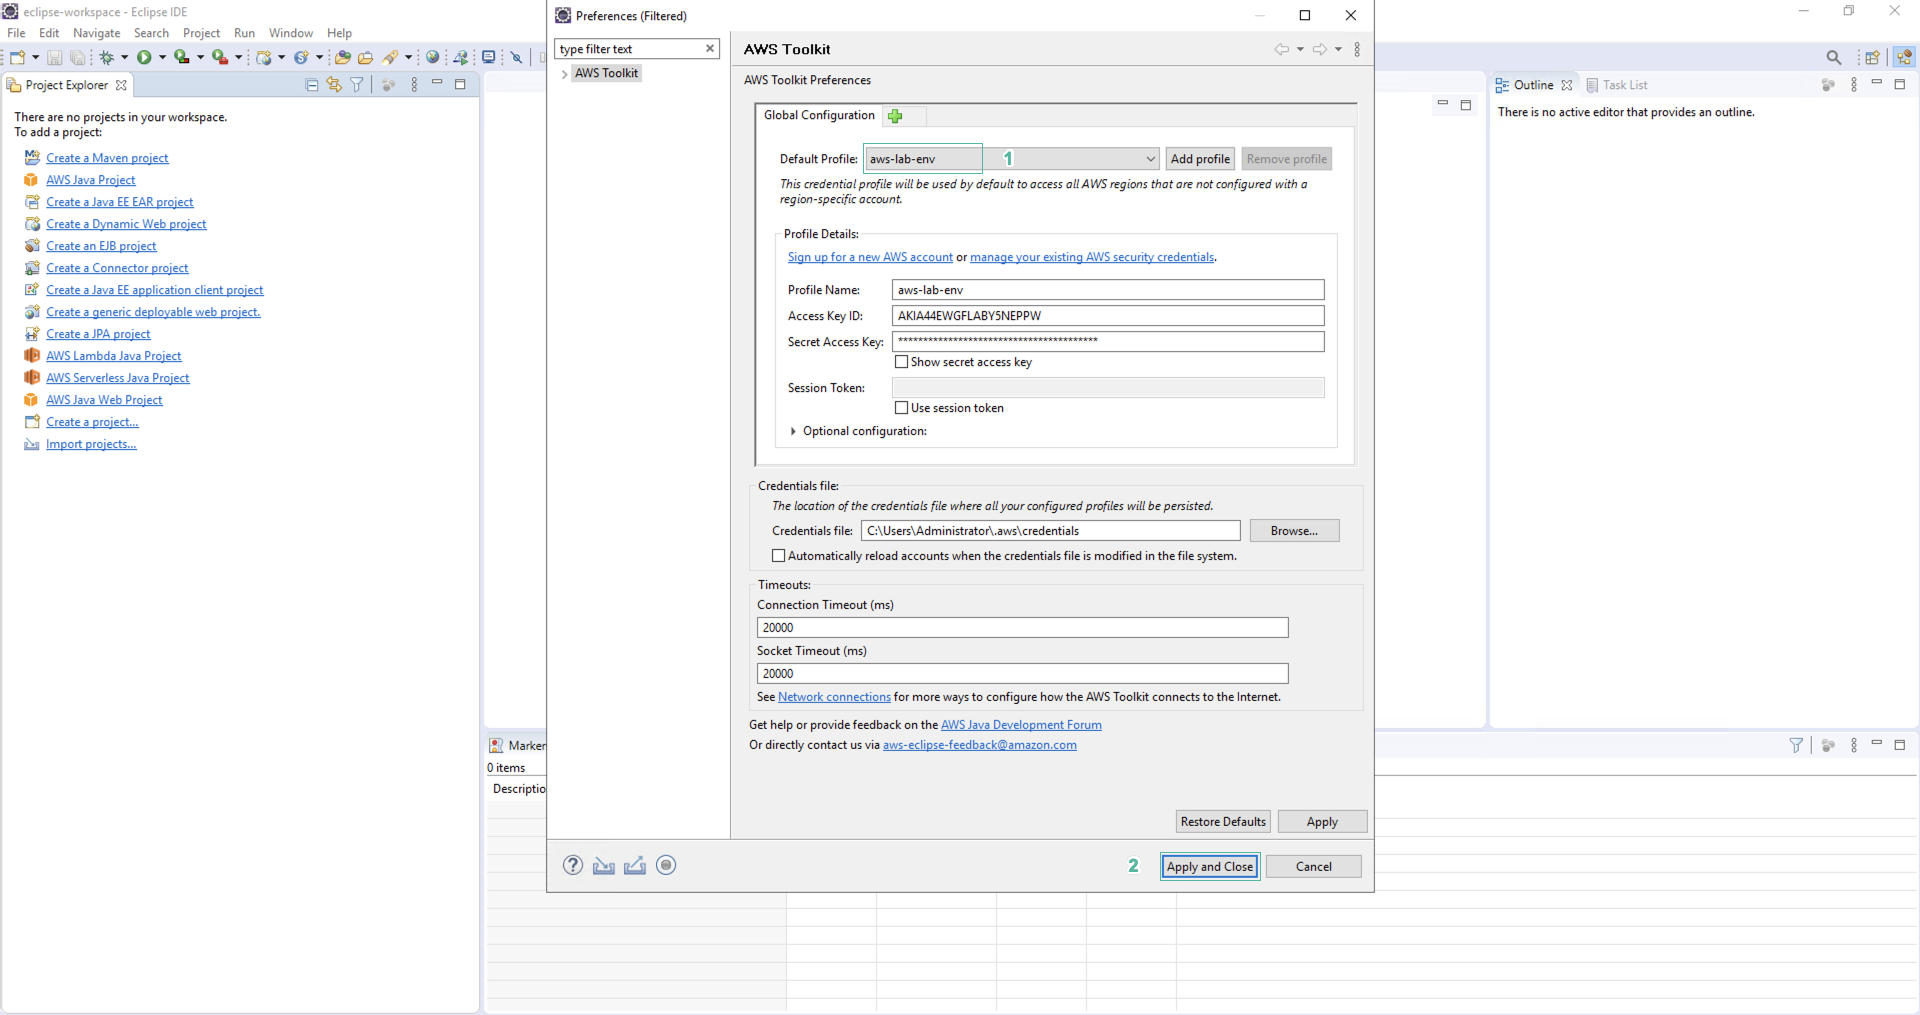
- Set Default Profile is aws-lab-env.
- Select Apply and Close.
Setting S3 buckets
You need to create 2 buckets. A bucket will contain the lambda function to be uploaded and a bucket used to store the image.
- Create S3 bucket to store Lambda function code. You can use the AWS Console or use the command line:
aws s3 mb s3://idevelop-sourcecode-<yourinitials> --region <region> --profile aws-lab-env
with is the unique name for your bucket. Replace with the region that matches your practice.
- Create another bucket to store uploaded images. Similar to the above step, we name the S3 bucket idevelop-imagemanager-. The command will be as follows:
aws s3 mb s3://idevelop-imagemanager-<yourinitials> --region <region> --profile aws-lab-env

After completing the above two steps, you will have 2 S3 buckets similar to the image below.
